vLLM is the software you put in front of an open model when more than one person is going to use it. It is fast, it is what most production deployments run on, and it has a reputation for being painful to install.
That reputation is earned, but the reason is narrow and worth understanding before you type anything. Most tools ship a program that just runs. vLLM ships pre-compiled GPU code — small, highly-optimised routines built specifically for one version of NVIDIA's CUDA toolkit and one version of PyTorch. If the versions on your machine do not match the ones the download was built for, the code cannot load. So the installer gives up on the download and tries to rebuild everything from source on your machine instead. That is the thirty-minute wait people complain about, and it usually ends in an error like undefined symbol that says nothing about the real cause.
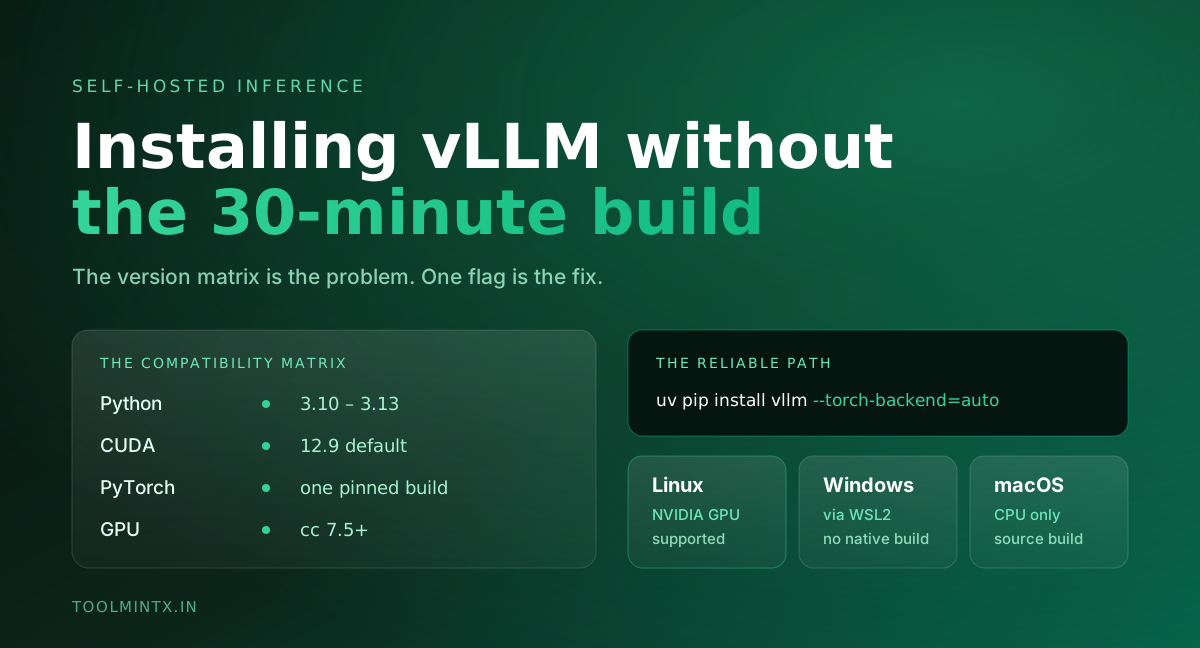
Here is the short version of the fix, and the rest of this guide is just the detail:
- Use
uvinstead ofpip. It has a flag,--torch-backend=auto, that looks at your GPU driver and picks the matching versions for you — removing the guesswork that causes most failed installs. - Install into a brand-new, empty Python environment. If PyTorch is already there, you are on the path to the slow rebuild.
Table of contents
- First, check that vLLM is even installable on your machine
- Why the install is hard (the actual reason)
- One more check, then size the model
- Linux with an NVIDIA GPU: the supported path
- Windows: WSL2, and the one mistake that breaks it
- macOS and Apple Silicon: CPU only, and what that means
- Serve a model and verify it
- The five errors everyone hits
- Lock the port down before you forget
- Is vLLM even the right tool for you?
- FAQ
- Sources
First, check that vLLM is even installable on your machine
Do this before running any command below. Most "vLLM won't install" frustration is actually one of these three answers being no, and no flag or reinstall can change them.
| If your machine is… | vLLM will… | What to do |
|---|---|---|
| Linux + NVIDIA GPU (compute capability 7.5+) | Work properly, GPU-accelerated | Follow the Linux steps below |
| Windows + NVIDIA GPU | Work inside WSL2 | Follow the Windows section |
| Mac (M1/M2/M3/M4 or Intel) | Run on CPU only — no GPU, source build, experimental | Use Ollama or LM Studio instead |
| Any machine with an older NVIDIA card (GTX 10-series or earlier) | Not work at all | Hardware floor — no workaround |
| Any machine, no NVIDIA GPU | Run on CPU only, slowly | Use Ollama or LM Studio |
Then check your Python version, because there is a hard floor here too:
python3 --versionvLLM needs Python 3.10 – 3.13. If that prints 3.9 (the version macOS still ships) or 3.14, the install will fail no matter what else you do. The Linux steps below solve this by having uv fetch its own Python — you do not need to touch your system one.
To be blunt about the Mac case, since it is the most common disappointment: vLLM's whole advantage is custom NVIDIA GPU code, and Apple Silicon has no NVIDIA GPU. There is no version of this guide where vLLM serves models fast on a MacBook. If that is your machine and you want local models, Ollama and LM Studio both use Metal properly and install in a minute. Read the rest of this as reference for the Linux box you deploy to.
Why the install is hard (the actual reason)
Ollama ships a self-contained binary. vLLM does not, because it cannot: its whole reason for existing is custom CUDA kernels — PagedAttention, continuous batching — that must be compiled against a specific CUDA toolkit and linked against a specific PyTorch ABI.
That produces a four-way compatibility matrix:
| Axis | Constraint |
|---|---|
| Python | 3.10 – 3.13 on the CUDA path |
| CUDA | Released wheels are built against 12.9; 12.8 and 13.0 also published |
| PyTorch | The wheel is built against one public PyTorch release |
| GPU | NVIDIA compute capability 7.5+ (T4, A100, L4, H100, B200) |
Three consequences follow, and each one is a documented failure rather than folklore:
A different CUDA version means building from source. So does a PyTorch that is already installed. The docs are direct about this: compiled kernels are "binary incompatible with other CUDA versions and PyTorch versions", even across differently-configured builds of the same PyTorch version. The recommendation is a "fresh new" environment, and that is not boilerplate caution — it is the single highest-yield thing you can do.
Conda-installed PyTorch is actively hostile here. It statically links NCCL, which breaks vLLM's own NCCL usage. If your PyTorch came from conda, you do not have a version problem, you have a rebuild.
Building from source needs GCC/G++ ≥ 11.3, because PyTorch's C++20 headers do not compile on older GCC. On an older LTS distro this is the wall people hit after the thirty-minute wait.
The reason uv fixes most of this is unglamorous: --torch-backend=auto inspects your installed CUDA driver and selects the matching PyTorch index for you. That one flag removes the most common cause of a mismatched install — a human picking the wrong index URL.
One more check, then size the model
You have already checked your GPU and your Python version. There is a third check, and it is the one people skip:
python3 -c "import torch" 2>&1 | head -1If that succeeds, do not install vLLM into this environment. A PyTorch that is already present is the single most common trigger for the slow source build, because vLLM's pre-compiled code was built against a different one. Success here is the bad outcome. Make a new, empty environment instead — Step 2 below does exactly that.
Now size the model before you download 40 GB of weights. vLLM claims 92% of your VRAM by default (--gpu-memory-utilization defaults to 0.92), and the KV cache lives inside that budget — so context length is a memory decision, not a free parameter. Work it out with the AI VRAM Calculator first: pick the model, set the quantization you actually intend to serve, and set a realistic context length rather than the model's theoretical maximum.
Linux with an NVIDIA GPU: the supported path
This is the only configuration vLLM treats as a first-class serving target. Four commands.
Step 1: install uv
curl -LsSf https://astral.sh/uv/install.sh | shStep 2: create a fresh, isolated environment
uv venv --python 3.12 --seed --managed-python
source .venv/bin/activate
--managed-python makes uv fetch its own Python 3.12 rather than trusting whatever the distro ships. On a system where python3 is 3.9 or 3.14, this is what saves you.
Step 3: install vLLM
uv pip install vllm --torch-backend=autoThat is the whole install. --torch-backend=auto reads your driver and picks the matching PyTorch index. To force one, use --torch-backend=cu130 or set UV_TORCH_BACKEND.
Step 4: verify before you trust it
python -c "import vllm; print(vllm.__version__)"If that prints a version, your kernels loaded and the hard part is over.
Prefer plain pip? It works, but you name the index yourself, which is precisely where mistakes happen:
pip install vllm --extra-index-url https://download.pytorch.org/whl/cu129One caveat if you go looking for nightlies: installing them with pip is unsupported, because pip merges the extra index with PyPI and takes whichever version is newest. uv gives the extra index priority. This is a real behavioural difference between the two tools, not a preference.
Blackwell owners: B200 and GB200 require a minimum of CUDA 12.8, so the PyTorch wheels must be at least that version.
Windows: WSL2, and the one mistake that breaks it
There is no native Windows build. vLLM's platform list names CUDA, ROCm, Intel XPU, Apple Silicon, and several CPU architectures — Windows is not on it. WSL2 is the working route.
Install WSL2 with Ubuntu from PowerShell:
wsl --install -d Ubuntu
wsl --update
Now the mistake. Inside WSL, nvidia-smi works and it is tempting to apt install the CUDA toolkit the normal way. Do not install a Linux GPU driver inside WSL. NVIDIA's guidance is unusually blunt about this — "This is the only driver you need to install. Do not install any Linux display driver in WSL" — because the Windows host driver is stubbed into the distro as libcuda.so. A standard CUDA Toolkit install bundles its own driver and clobbers that mapping. Your GPU stops being visible, and nothing in the error message points back at the cause.
So: install the NVIDIA driver on Windows only. Then, if you need the toolkit inside WSL, use the WSL-Ubuntu package from NVIDIA's CUDA downloads page, which deliberately omits the Linux driver. If you use meta-packages, install cuda-toolkit-12-x — never cuda, cuda-12-x, or cuda-drivers, all of which pull in the driver.
For vLLM specifically, you usually need no toolkit at all: the wheel ships pre-compiled kernels, and the host driver satisfies them. Install the Windows driver, then follow the Linux steps above inside the distro.
nvidia-smi # run this INSIDE wsl - if your GPU appears, the mapping worksTwo WSL2 realities worth knowing. NVIDIA still labels toolkit support on WSL a preview — application development and compilation are supported, but not every profiler is there. And GPU acceleration needs Pascal or later in WDDM mode; TCC-mode Quadro and Tesla cards are not covered.
macOS and Apple Silicon: CPU only, and what that means
Be clear-eyed about this one. On Apple Silicon, vLLM is a source build, CPU-only, and labelled experimental. There is no Metal or MPS acceleration in-tree.
Requirements: macOS Sonoma or later, XCode 15.4+ with Command Line Tools, Apple Clang ≥ 15.0.0, Python 3.10–3.13. There are no pre-built Apple Silicon wheels and no pre-built container images.
git clone https://github.com/vllm-project/vllm.git
cd vllm
uv pip install -r requirements/cpu.txt
uv pip install -e .
VLLM_TARGET_DEVICE is set to cpu automatically — you do not choose. Two build failures are called out specifically: missing standard C++ headers (reinstall Command Line Tools) and constexpr errors from an older C++ standard (add set(CMAKE_CXX_STANDARD 17) to cmake/cpu_extension.cmake).
Note also that the CPU quantization support list covers x86 and s390x only — AWQ, GPTQ, and INT8 W8A8 are not listed for Apple Silicon. The build is smoke-tested in CI on the latest GA Apple Silicon runner; other macOS or Clang versions are best-effort.
The docs do not literally say "development only", so we will not put words in their mouth. What they do say is: experimental, source-only, CPU-only, FP32/FP16 only. Draw the obvious conclusion. If your goal is high-throughput serving on a Mac, vLLM is the wrong tool and LM Studio or Ollama are the right ones — both have real Metal acceleration. If your goal is to develop against vLLM's API on a Mac and deploy to a Linux GPU box, this build is exactly what you want.
There is a community hardware plugin, vllm-metal, that uses MLX as its compute backend. It is out-of-tree and community-maintained — evaluate it on those terms.
Serve a model and verify it
Start small. A 1.5B model proves the install without a long download.
vllm serve Qwen/Qwen2.5-1.5B-InstructThat serves on http://localhost:8000 (override with --host and --port). One model per server process.
Check it is up:
curl http://localhost:8000/v1/modelsThen a real request:
curl http://localhost:8000/v1/completions \
    -H "Content-Type: application/json" \
    -d '{
        "model": "Qwen/Qwen2.5-1.5B-Instruct",
        "prompt": "San Francisco is a",
        "max_tokens": 7,
        "temperature": 0
    }'
Because it speaks the OpenAI protocol, any OpenAI client works — point base_url at http://localhost:8000/v1 and pass a dummy key.
For offline batch work, skip the server:
from vllm import LLM, SamplingParams

llm = LLM(model="facebook/opt-125m")
outputs = llm.generate(["The capital of France is"], SamplingParams(temperature=0.8, top_p=0.95))
print(outputs[0].outputs[0].text)
One trap in that snippet that costs people an afternoon: llm.generate does not apply the model's chat template. On an instruct or chat model, raw generate produces noticeably worse output for reasons that look like a model problem. Use llm.chat(messages, sampling_params), or apply tokenizer.apply_chat_template yourself.
Related: vLLM applies generation_config.json from the Hugging Face repo by default. If you want vLLM's own defaults instead, pass generation_config="vllm" (or --generation-config vllm on the server).
The five errors everyone hits
1. undefined symbol or a missing library on import vllm. Your kernels were built against a different PyTorch or CUDA than the one present. This is the fresh-environment rule being enforced. Do not debug it — rebuild in a clean venv with --torch-backend=auto.
2. Out of memory at startup, before any request. vLLM pre-allocates. Default --gpu-memory-utilization is 0.92, and the KV cache is inside that. Lower it, or cap what actually drives the cache:
vllm serve <model> --gpu-memory-utilization 0.85 --max-model-len 8192 --max-num-seqs 8--max-model-len caps context, --max-num-seqs caps concurrent sequences. If unspecified, --max-model-len is derived from the model config, which frequently means the model's theoretical maximum — often far more than you need and the usual reason a model that "should fit" does not.
3. Still out of memory after that. CUDA graphs are on by default and cost extra GPU memory. Either cap the capture sizes via compilation_config with cudagraph_capture_sizes (e.g. [1, 2, 4, 8, 16], which otherwise goes up to max_num_seqs), or disable capture entirely with --enforce-eager. Eager mode is slower — it is a memory-for-speed trade, so try the flags in order.
4. Two vLLM processes on one card, both crash. --gpu-memory-utilization is per-instance, not global. Two servers each claiming 0.92 of the same GPU is 184%. Give each ~0.45.
5. A source build that runs 30+ minutes and then fails. Check GCC (gcc --version, needs ≥ 11.3). And ask why you are building at all — a mismatched CUDA or a pre-existing PyTorch is almost always the answer, and a clean venv is faster than fixing the compile. If you genuinely must build and the machine has limited RAM, cap parallel jobs with MAX_JOBS.
Lock the port down before you forget
vLLM's server has no authentication by default. Left as-is on a reachable interface, anyone who can hit port 8000 can use your GPU and read anything you send through it.
Enable a key:
vllm serve <model> --api-key "$(openssl rand -hex 32)"Or set VLLM_API_KEY. Multiple keys are accepted, so rotation does not require downtime. Generate real values rather than reusing a memorable string — the API Key & .env Secret Generator does it locally in your browser.
Also bind deliberately. If the server only serves apps on the same machine, keep it on loopback and put a reverse proxy with TLS in front for anything else. A GPU box on a shared network with an open inference port is a standing invitation.
Is vLLM even the right tool for you?
This deserves a straight answer, because a lot of people install vLLM when they wanted Ollama.
| vLLM | Ollama / LM Studio | |
|---|---|---|
| Install | Version matrix, fresh venv required | Single installer |
| Platforms | Linux GPU (real), WSL2, macOS CPU-only | Linux, Windows, macOS all native |
| Concurrency | Continuous batching, high GPU utilisation | Requests largely serialise |
| Single-user latency | Good | Good, and far easier |
| Apple Silicon GPU | No in-tree support | Yes, Metal |
vLLM earns its complexity when you have concurrency. PagedAttention plus continuous batching keeps the GPU busy across many simultaneous requests, which is exactly what a single-user desktop chat never needs. If you are one person talking to one model, Ollama will serve you better and install in a minute — see LM Studio vs Ollama for that decision. If you are putting a model behind an API that several people or several agent loops will hit at once, vLLM is worth the setup and the alternatives will bottleneck.
Choose on that axis — concurrency — not on benchmark screenshots.
FAQ
What is the single most reliable way to install vLLM?
A fresh uv virtual environment on Linux with an NVIDIA GPU, then uv pip install vllm --torch-backend=auto. The fresh environment prevents the binary-incompatibility failures, and --torch-backend=auto picks the PyTorch index that matches your driver instead of making you guess.
Can I run vLLM natively on Windows?
No. vLLM's supported platform list has no Windows entry. Use WSL2 with Ubuntu, install the NVIDIA driver on the Windows host only, and follow the Linux instructions inside the distro.
Why does my GPU disappear inside WSL after I install CUDA?
Because you installed a Linux GPU driver, which overwrote the Windows host driver that WSL maps in as libcuda.so. Install the driver on Windows only. If you need the toolkit inside WSL, use the WSL-Ubuntu package or the cuda-toolkit-12-x meta-package — never cuda, cuda-12-x, or cuda-drivers.
Does vLLM use the GPU on an M-series Mac?
Not in-tree. The native macOS path is an experimental, source-only, CPU-only build with FP32/FP16 support. Metal acceleration exists only through the community vllm-metal plugin, which uses MLX. For GPU-accelerated local inference on a Mac, Ollama or LM Studio are the practical choices.
Why does vLLM run out of memory when the model should fit?
Two usual causes. --gpu-memory-utilization defaults to 0.92 and the KV cache is inside that budget. And --max-model-len, if unset, is derived from the model config — often the model's maximum context, which makes the cache far larger than your workload needs. Set both explicitly, and use the AI VRAM Calculator to pick a context length you can actually afford.
Do I need to install the CUDA toolkit?
Usually not. Released wheels ship pre-compiled CUDA 12.9 binaries, and the driver satisfies them. You need the toolkit only when building from source — which itself is a sign that something in your environment (a different CUDA version, or a pre-existing PyTorch) needs fixing first.
Is the vLLM server safe to expose?
Not as shipped — authentication is off by default. Pass --api-key or set VLLM_API_KEY, keep the bind address on loopback unless you have a reason otherwise, and terminate TLS at a reverse proxy for anything beyond the local machine.
Sources
- vLLM GPU installation docs — Python and CUDA support,
uvinstall commands, CUDA 12.9 default wheels, binary-incompatibility and GCC ≥ 11.3 warnings, conda/NCCL caveat - vLLM CPU installation docs — macOS Sonoma / XCode 15.4 / Apple Clang requirements, source-only build,
vllm-metalplugin note, documented build failures - vLLM quickstart —
vllm serve, port 8000, curl examples, offlineLLMclass, chat-template caveat,--api-key - vLLM engine arguments —
--gpu-memory-utilizationdefault0.92,--dtype auto,--enforce-eagerdefaultFalse,--max-model-lenderivation - vLLM: conserving memory —
max_model_len/max_num_seqs, CUDA graph capture sizes,enforce_eager, quantization - vLLM installation index — supported platform list (no Windows entry)
- NVIDIA CUDA on WSL user guide — host driver stubbed as
libcuda.so, explicit "do not install any Linux display driver in WSL", WSL-Ubuntu package guidance, WDDM/Pascal requirement - vllm-project/vllm on GitHub — Apache-2.0 licence, hardware support matrix